


If you’re after a Damper Recipe that works just as well in the oven at home as it does in the camp oven, this is it!
There are lots of stories about where the first damper recipe was developed. It was in Australia, way back in the days of the first fleet.
Some say it began as a bushman’s staple – the perfect tummy filler for swagmen, drovers, stockmen and other travellers because the early damper recipe used only flour, water and salt so there were no perishable foods in the damper recipe.
The Australian Food Timeline reports that some believe the first damper recipe was developed in Sydney. They report that Historian James Bonwick ( 1817 – 1906) refers to a First Fleeter by the name of William Bond, who had a bakery in Pitt Street, and claims the first bread he made was damper. According to Bonwick, the name was derived from Bond’s way of “damping” the fire, covering it with ashes. This preserved the red coals, ready to re-kindle the fire the following morning. The damper was buried in the ashes to bake.
We don’t really mind who created the first damper recipe – we’re just glad they did. Any damper recipe brings back so many memories of camping as a youngster and watching as Dad sat a big plump damper into the camp oven. His Damper recipe was a little more interesting than the first damper. He added milk and a few dobs of butter which he’d let us work into the flour with nimble little fingers.
Dad would then channel his own Father and whip out the Golden Syrup once the damper was ready to eat. Golden Syrup is a 100% natural syrup made from sugar that has a delightfully sweet caramel toffee aroma and taste, which is perfect for adding to scrumptious baked goods like this damper recipe. Lashings of butter too.
What else can you add to your Damper Recipe?
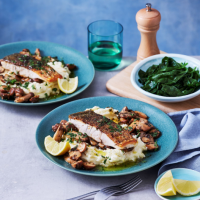
Wow! It’s such a versatile base, you can add almost anything! This Damper with Spinach and Feta from MoM Member Tara is amazing with a big bowl of soup – or on it’s own with a swipe of cream cheese or butter. Or you can go as sweet as you like and add nuts, currants, sultanas, a handful of brown sugar, chopped dates or even choc chips!
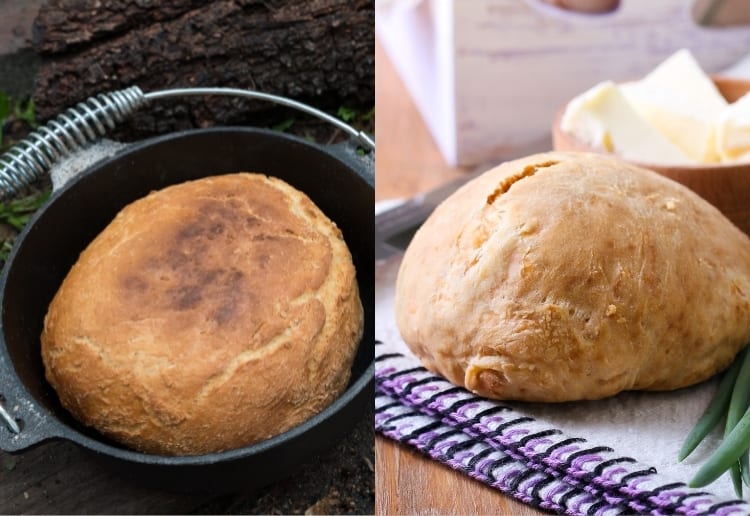
This Damper Recipe is happy in the oven at home or the camp oven out bush …
Whether you’re making your damper at home or giving your camp oven a whirl out bush, just remember to start with a hot oven and then pull it right back in heat so that the damper cooks through without charring the outer shell.
Once you’ve tried this Damper Recipe, we’d love you to come back and give us your thoughts in the comments below.
Don’t forget that if you have a recipe like this Damper Recipe that you’d like to share, we LOVE recipes from members. Just whip up your favourite recipe, take a photo and then share it with thousands of other Mums by POSTING YOUR RECIPE.
Ingredients (serves 8 | makes 1 Large Damper)
- 4 cups Self Raising Flour (or Bread Flour if you have it)
- 1 tbsp Butter, softened
- 1 tsp Sea Salt Flakes
- 1 cup Milk
- 1/2 cup Water
Method
- Preheat your oven to 220 degrees celcius. If you're using your camp oven and an open fire, this will be much trickier. Wait until you have beautiful coals that are a snowy grey colour. They will be scorchingly hot so don't be fooled by the lack of red glow! If you have an outdoor cooking thermometer, dig this into the coals and hold it there until you get a stable reading. If it's too hot, spread the coals out a little to cool off. If it's too cold, you'll need to add more wood to create good quality coals. VIP - if you are cooking on an outdoor fire, please make sure you are using natural wood. Don't ever burn timber that has been treated for use in building or landscaping as poisonous gases can burn off!
- Whether you are using a camp oven or a baking tin, spray liberally with olive oil and then heavily coat in flour. This will ensure your damper doesn't stick.
- To make the Damper: In a large bowl, stir together the flour and the salt. With a food processor, a butter knife or your fingertips, cut in the butter. Make a well in the centre of the flour mixture and pour in the milk and water. Stir gently until the dough comes together. Turn the dough out onto a lightly floured surface and form into a round loaf a little smaller than your baking tin or camp oven. Place the damper dough into the prepared pan and cut a cross in the top.
- Bake for approx 25 minutes in the oven, then lower the temperature to 175 degrees C and continue to bake for another 5 to 10 minutes. The loaf should be golden brown all over and the bottom should sound hollow when tapped.
- Turn out into a clean tea towel and sit for 5 minutes to cool slightly. Then cut or break it open, slather in butter and go for your life!


1:31 pm
1:04 am
7:17 pm
7:38 pm
3:29 pm
5:36 pm
12:13 pm
1:18 am
1:18 am
10:18 pm
9:30 am
11:22 pm
12:54 am
3:25 pm
8:39 am
5:00 pm
11:12 am
9:11 am
11:40 am
1:25 pm
- «
- 1
- 2
- 3
- 4
- …
- 6
- »
Post a commentTo post a review/comment please join us or login so we can allocate your points.