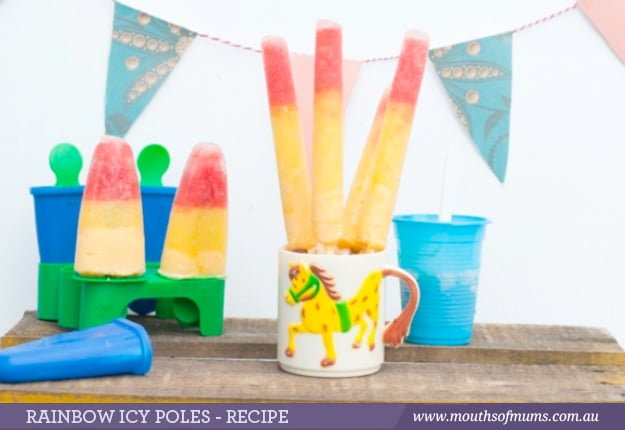
A wonderful fruity rainbow icy pops recipe, perfect for those hot summer days!
I don’t want to start any trouble. I really don’t.
I’d hate to hear that your children were erupting into wars with each other, or standing at the freezer crying so these icy pops come with a warning.
THEY ARE REALLY, REALLY VERY BLOODY ADDICTIVE.
The issue I had was when I was down to my last three, but I had four children here. I gave them all a piece of fruit and a biscuit and thought I’d gotten away with it until D Man piped up loudly with –
‘Can I have a rainbow icy pop, please?’
It was like time stopped. You could see the children’s heads whip around and stare at me, their little beady eyes boring holes into my skin.
‘Please?’
I had another Mum standing in my kitchen. She said she was fine for the kids to have one. I had to ‘fess up.
‘I only have three. There enough for the two big kids and not the two little ones’
‘Oh no’ she shook her head sadly ‘it’ll be mutiny’
D Man was already head down, bum up in the freezer drawer. He was unsheathing a fruity saber from it confines as I stood there dithering.
I quickly grabbed two, and like a bolt of lightening I shoved the big kids out the door whilst shoving them in their grubby mitts and offered the wee ones a dried apricot. Poor substitute.
The littlies knew something was up, but thankfully they have the attention span of gnats…. Unless it’s 3am.
You want to know what the best part of this story is?
There was one left for me.
Initially, I wanted twice the layers, all of them to be perfectly divided like the amazing ones you see on Pinterest. Alas, who has the time or patience??
Not I, it would appear.
That said, these are by no means difficult. They’re a piece of cake, and totally worth the effort. If you have neither time nor patience, just fill each one with one of the different flavours and be done with it, but if you can be bothered, you’ll be as popular as I am around the homestead.
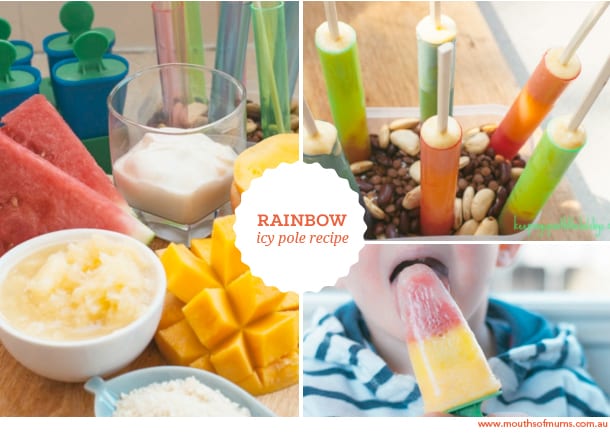
The long pops were made in test tube shot glasses I found in the party favour aisle of my local supermarket and the sticks were wooden chopsticks. I stood them in a deep plastic container filled with my baking beans (the beans I always use for blind baking my pie crusts, but you could use rice or whatever) to make them stand up.
You can also use plastic cups with plastic spoons for handles or the old fashioned icy pole making kits.
- 2 cups watermelon flesh
- 1/2 cup lemonade
- 1/2 tin crushed pineapple in juice
- flesh of 1 mango
- 2 tablespoons vanilla yoghurt (five:am organic all the way)
- 1 heaped tablespoon almond meal
Blitz your watermelon flesh until smooth then add your lemonade. If you prefer them totally sugar free, omit the lemonade, but I love a little tingle of effervescence in my top layer. Half a cup between all the pops is nothing to stress about in my humble sugar loving opinion… not that I’m an expert.
Divide between your icy pole holders, and pop into the freezer for about 30-45 minutes until the top has hardened.
Blitz your pineapple (you could add some coconut cream if you wanted. I nearly did but decided against it last minute – you could totally do Pina Colada adult ones too…..YUM!!), and add that as your next layer when the time is right. Freeze again for 30-45 minutes.
Blitz your mango with the yoghurt and add the almond meal to give it a little more body. Add that to your pops, and slide your sticks or spoons in, or place the icy pole lid on before sticking into the freezer for a good few hours.
If you liked this recipe and story, you should head over to my Facebook page or subscribe via email to ensure you can always Keep Up With The Holsbys.









10:54 pm
6:59 am
5:08 am
11:59 pm
2:19 pm
1:55 pm
11:53 am
11:39 am
1:58 pm
9:05 am
1:34 pm
8:13 pm
4:07 pm
3:23 pm
12:48 pm
9:33 am
9:05 am
8:33 am
8:33 am
12:09 pm
- 1
- 2
- …
- 10
- »
Post a commentTo post a review/comment please join us or login so we can allocate your points.