61 Comment
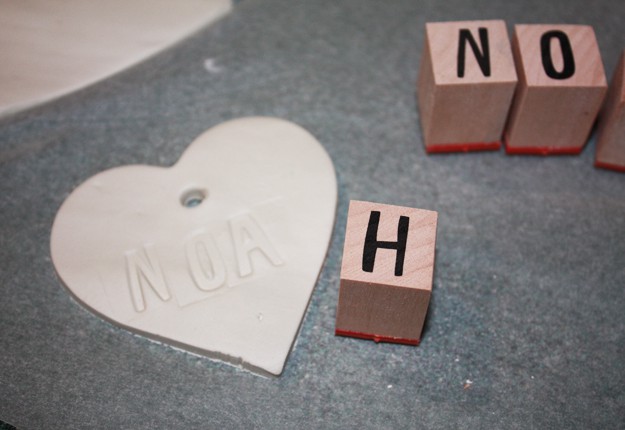
A great DIY clay decoration tutorial you can do with the kids. Great for Christmas tree decorations, and Easter tree or even for a birthday present for a friend. Fun, easy and creative!
Material
- 1 pack of self setting modelling clay (or fimo but you will have to bake it if you use that)
- 1 set of alphabet stamps (I got mine from Kikki K)
- 1 collection of stamps with images
- 1 straw / circular shaped piece of metal to cut out the hole for hanging ribbon
- 1 roll of ribbon
- 1 cookie cutter / fim cutter ( i used heart and tree shapes)
Method
- On a dry and clean surface roll out your clay as you would cookie dough (I suggest around 1/2 - 1 cm thick)
- Using your cookie cutter press your shapes out of the clay. once you have got as many as you can from the sheet of clay I would roll up the scraps - re roll it out and get a few more stamps out of them.
- press out the hole in the top of each shape where you want it to hang from
- print in any letters / icons onto each ornament
- let dry / fire depending on the type of clay
- Thread ribbon through the top hole and tie in a loop so you can hang from your tree / bunting
- If you have time now you can paint them too
Notes
You can add dye to the clay if you wanted it to be extra special - the pearl pigments look really shimmery and adding glitter to the clay also works really well!
Want other brilliant projects sent to you?
You might also like…
This project was posted by:









5:05 pm
10:20 am
9:50 pm
-

-
-
kjgarner replied
- 28 Jun 2018 , 8:54 pm
Reply2:48 pm
8:24 am
11:21 pm
5:45 am
1:23 am
10:18 pm
4:02 pm
11:09 pm
-

-
-
mom94125 replied
- 07 Oct 2015 , 10:12 pm
-

-
-
mom93821 replied
- 11 Oct 2016 , 5:11 am
Reply8:49 pm
3:41 am
6:29 pm
1:57 pm
12:31 pm
-

-
-
scottie replied
- 29 May 2014 , 6:55 am
Reply2:56 pm
4:08 pm
5:37 pm
12:20 pm
- 1
- 2
- …
- 4
- »
Post a commentTo post a review/comment please join us or login so we can allocate your points.