66 Comment
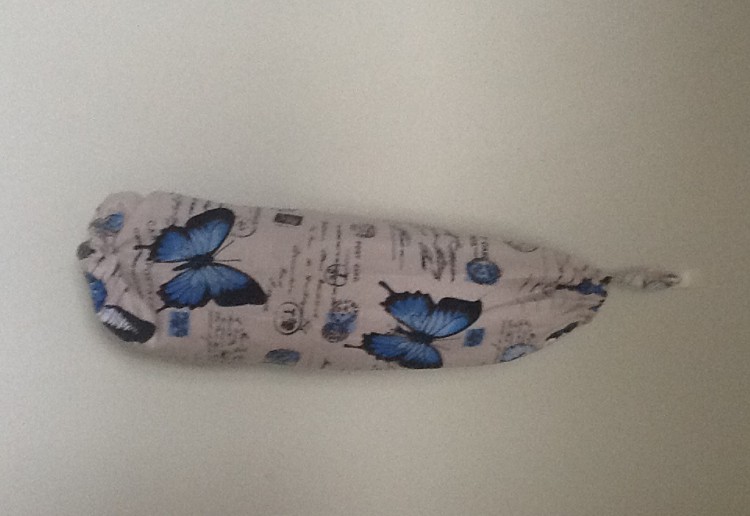
A neat way to store plastic bags.
Material
- 1 Piece of fabric 28“ long X 18” wide (I like to use medium weight home decor fabric, but just about any type of woven fabric will do. Avoid stretchy knit fabrics for this project.)
- 1 Matching thread
- 1 yard Ribbon, string or cording
- 1 12” of 1/2" wide ribbed elastic
Method
- Lay out fabric with the “right side” facing down. (“right side” is a sewing term for the front side of the fabric.)
- Fold over both the top and bottom edges of the fabric by 2 inches each. Carefully measure, fold, and pin the fabric in place. Iron the folded edge to make a sharp crease line.
- Remove the pins and unfold the fabric. This time fold over the top and bottom edges so they meet the crease line you just ironed. (This new fold is half the size of the first fold.). Pin the fabric in place and iron this new fold to make another sharp crease line.
- Remove the pins and unfold the fabric again. You should see 2 nicely ironed lines along the top and bottom edges of the fabric approximately 1 inch apart from each other.
- You now have a double 1” fold.
(I like to refold the fabric and give it one additional press with the iron to set in the creases.) - Unfold both top and bottom edges and place the fabric on your work surface flat with “right side” (front side) up.
This time fold the fabric so that the two long side edges meet. This will give you the tube shape of the plastic bag holder. Be sure that the top and bottom edges line up evenly. Pin the fabric to hold it in place - With a fabric marker or pencil you will mark two lines at the top and two at the bottom.
The first mark should be placed 2” away from the top or bottom edge. (This will line up with one of your ironed creases.) The second mark should be 1 inch away from the first. - The area between these two marks will not be sewn in Step Four. This is the location where you will insert the ribbon at the top and elastic at the bottom in a later step.
- I like to use the width of the presser foot as my guide for the seam allowance width. (Many store bought patterns will instruct you to use a 5/8” seam allowance. If you are more comfortable with working this way you can do a 5/8” seam allowance here too.)
- Starting at the top edge of the fabric, stitch down to the first marked line and stop. If your machine has a “backtrack” or reverse stitch, stitch backwards a few stitches. This will make sure the last stitch at the pencil mark will not loosen up or pull out with wear and tear.
- Note: Do not sew over the pins, doing so could cause damage to your machine. Stop stitching when approaching a pin and remove it.
- Lift the presser foot and line up the needle with the second pencil mark. (Remember you are not sewing between the two marks).
(After a few stitches you may want to stitch in reverse back up to the pencil mark to provide additions strength against wear and tear here too.)
Continue stitching down the length until you reach the mark at the bottom. Skip over the space between the pencil marks like at the top, backstitching as you feel necessary. Finish stitching from the second pencil mark to the end of the fabric.
Trim off the top and bobbin threads as necessary. - Ironing again.
(You will soon find that an iron is an essential part of the sewing process. It often is the difference between having your final product looking profession or no-so professional.)
Lay your fabric on the ironing board with the seam in the center. Separate the 2 sides of the seam allowance and “finger press” down the center to help them lay flat.
(Finger Pressing simply means to push down with your thumb or forefinger to guide the fabric to where you want it to go)
Now with the iron, press flat, adjusting each side of the seam allowance as you move.
Turn the plastic bag holder right side out and press the seam from that side too. - Turn the grocery bag holder wrong side out again.
Fold the fabric under, along the crease lines, at the top and bottom, and pin into place. - If your sewing machine has a free arm, it will come in handy for the next step.
If yours doesn’t, just carefully move and adjust the fabric as you sew to make sure you don’t stitch the front and back of your tube together. - Stitch right next to the bottom edge of the fold, all the way around the tube.
This should be done at both ends of this grocery bag holder. - If your ribbon or cording could fray on the ends, tie a small knot at each end to prevent it.
- Place a safety pin in one end of the ribbon or cording. Insert it into the top “casing” opening along the seam. (This is the area between the 2 pencil marks from steps 3 and 4.)
Using the safety pin as your guide, push it through the “casing” and out the other end. It may take some practice to get the hang of this. --- Push the pin while gathering fabric. With one hand, hold the pin in place, and with the other hand, pull the back of the gathered fabric to straighten it out. Repeat this several times and little by little the pin will move through the casing to the other end. - Pull all the way through, (but not so far that the un-pinned end disappears into the casing).
Tie a knot or bow to connect the two ends. Adjust the fabric and ribbon/cording so it is evenly distributed. (Don’t forget to remove the safety pin) - Mark your piece of elastic 9” apart, leaving a small tail on each end.
Make sure the line is easily visible. (Because you will be lining these up with each other after they are pulled through the tube.) - You will be pulling this elastic, through the bottom “casing”, with a safety pin, just like you did for the ribbon in the top. They only tricky part is that because it is much shorter, you will need to be more careful that the opposite end does not disappear into the tubing. (If it does, just work the pin around to the other end, pull the elastic out entirely, and start again)
You may need to pin the loose end to the fabric, near the casing opening to avoid this - After you have inserted the elastic through the “casing” and the two tails are sticking out, line up the two marks you made in step 8.
Stitch along the double layers of elastic at this mark. Use your reverse stitch to go over the stitches again to create a strong hold. - You can shorten the tails of the elastic if you’d like, but it is not necessary. (Be sure not to trim too close to the stitching. You don't want it to fray and loosen the stitches.
Adjust the fabric so that the gathers around the elastic are fairly even.
Notes
A plastic bag holder is a fun, easy sewing project to make in a short amount of time. The finished project is a fantastic way to control your collection of plastic grocery bags, which gets bigger and bigger with every trip to the store.
Want other brilliant projects sent to you?
You might also like…
This project was posted by:



.jpg)









7:57 pm
2:22 pm
3:49 pm
-

-
-
kjgarner replied
- 28 Jun 2018 , 10:59 pm
Reply8:26 pm
-

-
-
kjgarner replied
- 29 Jun 2018 , 11:29 am
Reply9:16 am
11:03 pm
9:13 am
6:53 pm
8:20 am
10:34 am
-

-
-
mom94125 replied
- 23 Feb 2015 , 3:44 pm
Reply8:03 pm
4:59 pm
6:38 am
10:30 am
-

-
-
mom111059 replied
- 26 Jun 2018 , 11:59 am
Reply8:24 pm
1:48 pm
8:21 pm
4:26 pm
9:57 pm
8:12 pm
- 1
- 2
- …
- 4
- »
Post a commentTo post a review/comment please join us or login so we can allocate your points.