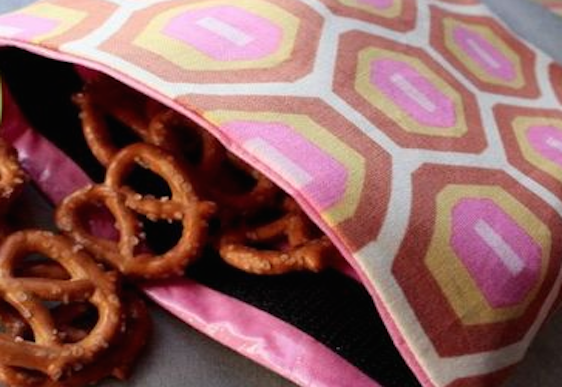
Cut out the packaging in your kids lunchbox by making your own reusable snack and sandwich bags.
What you’ll need:
- Outside cotton fabric
- Cotton lining fabric
- Iron on vinyl
- Velcro
- Needle and thread
- Iron
Method:
- Firstly, cut your pieces. For a sandwich sized bag, cut two pieces of each fabric and the vinyl into 6 1/2 inch squares. For the smaller version, cut into 6 and a 1/2 inches x 4 and a 1/2 inches.
- Cut a piece of velcro 6 and a 1/2 inches long.
- Heat your iron to wool setting.
- Pull vinyl off backing and place it on one of the liner fabric pieces sticky side down.
- Place the backing back on top of the vinyl and iron over the top for 20 seconds or until the vinyl is stuck.
- Repeat steps 4 and 5 with the second piece of vinyl and lining fabric.
- Pin one half of the velcro strip 3/4 inch from the top of the vinyl-coated side of one of the pieces of lining fabric.
- Repeat with the other piece of lining fabric and the other half of the velcro.
- Sew to attach the velcro.
- Pin one piece of lining fabric with velcro to one piece of outside fabric, right sides together and sew 1/4 inch from the top.
- Repeat with other lining and outside fabric.
- Open up both your pieces and with right sides together, place one on top of the other.
- Sew around the perimeter 1/4 inch in and leave a 2 inch hole at the bottom for turning.
- Turn the fabric the right way and sew the hole shut.
- Turn the vinyl coated lining fabric inside the outer fabric and your pocket is ready to fill with the kids snacks.
There looks like a few steps but these are quick and easy to make and so handy for the kids lunches and snacks.
What’s your child’s favourite lunch box snack?
PLEASE share with us in the comments below
Image credit: Pinterest











8:14 am
9:25 am
9:06 am
9:34 pm
11:12 am
11:20 am
10:56 am
8:54 am
3:22 am
10:36 pm
12:08 pm
7:54 pm
6:02 pm
11:28 am
-

-
-
mom93821 replied
- 07 Sep 2016 , 5:45 am
Reply9:19 am
12:54 pm
12:04 pm
11:45 am
8:31 am
11:51 pm
- 1
- 2
- »
Post a commentTo post a review/comment please join us or login so we can allocate your points.