Remember making pom poms all those years ago? Funny how some crafts reinvent themselves many years later and they’re still as cute and tempting to make.
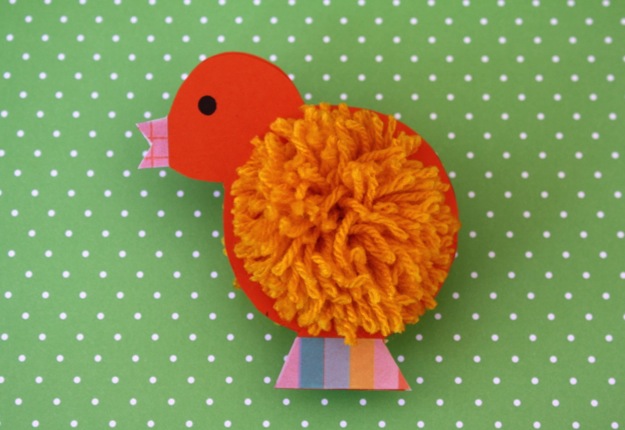
I saw these Pom Pom Easter Chicks on Pinterest and had to give it a go. My 6 year old enjoyed helping too and he was so focused it was actually quite peaceful for a few moments! If you don’t have the orange cardboard and yellow wool available then just have fun experimenting with all different coloured chicks!
Materials:
- Cardboard
- Wool
- Plastic needle (if you don’t have one then just feed the wool through the hole using your fingers)
- Coloured markers (we actually used washi tape for the feet and beak, but it can easily be coloured using textas or crayons)
- Scissors
- String
Method:
1. Draw the outline of the chicken twice as you need 2 chickens for the pom pom to form correctly.
2. Cut out the chickens and use a blade or scissors to carefully cut a small hole in the middle.

3. Thread the wool through the plastic needle. You will need a few metres of wool, so it’s best not to cut it until you’ve finished.
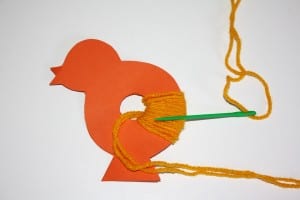
4. Loop the wool through the hole and around the outside of the chicken multiple times until it’s approximately 2-3 layers thick.
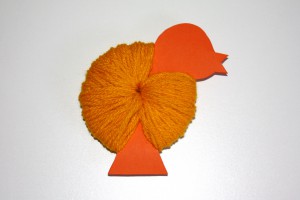
5. Cut around the wool using the gap between the cardboard as a guide.
6. Once you’ve finished, place the piece of string around the chicken but in between each cardboard piece. Pull the string tight and tie a knot.
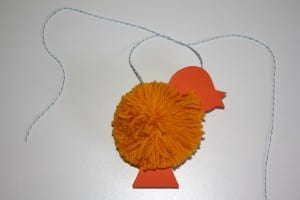
7. Fluff out the wool and trim any long ends.
8. Colour in the feet, beak and give the chick some eyes.
You might want to make a few chicks to hang on a mobile or a garland for Easter. You could even try doing it with a bunny rabbit outline too!












11:30 am
2:05 pm
10:31 pm
11:00 pm
1:32 pm
8:15 pm
7:41 pm
6:53 pm
6:36 pm
2:46 pm
12:53 am
11:30 pm
6:50 pm
4:55 pm
3:25 pm
3:02 pm
3:01 pm
9:22 pm
7:20 pm
12:42 pm
- 1
- 2
- …
- 6
- »
Post a commentTo post a review/comment please join us or login so we can allocate your points.