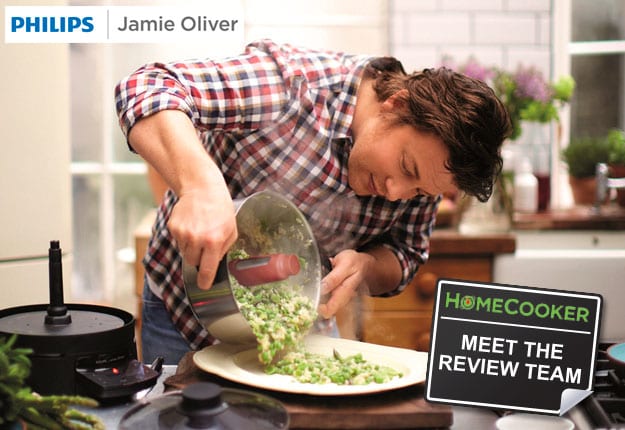
Hello!


  • Creamy Pasta Sauce

    So today I decided to test the Jamie Olive Homecooker to cook a creamy pasta sauce.
    Usually cooking a pasta sauce that involves fresh cream requires constant stirring to prevent the cream from sticking to the bottom of the pan as well as prevent it from separating.
    The stirring arm played a good part in this recipe.
    First it browned the chicken well without sticking and burning. While it was doing this I had time to sit with my kids and look at their homework. i had set the time to 20 minutes and the machine beeped when the time was up. Secondly when I added the freah cream cheese to my pasta sauce the stirring arm helped to combine the sauce together into creamy goodness.
    I tried out the steamer basket to steam pasta ravioli, this was a hit and miss as it required a lot of time to steam the ravioli then I had anticipated. I learnt that in order to cook pasta ii really neededtoboil it rathe than steam.
    i learnt that food such as pasta reauires a lot of time so it is best to boil pasta using the pasta insert ove hot boilling wate in the homecooker.
    The steamer basket worked perfectly fine to steam vegetables ove a hot simmering curry though..
    I loved the results and would definately reccomend the homecooker to anyone.
    I have uploaded a video of my cooking experience on youtube which you can view by copying andpasting the url below onto your browser.
    Cheers
    http://m.youtube.com/watch?v=_m9Y4BCNIfA

    Would you recommend to other mums?
    Versatile & suitable for lots of recipes
    Saves time & makes my life easier
    Simple to understand & easy to use


  • Chicken Cacciatore with Garlic Mash

    This recipe is one of my favourites. Its so easy to do & follow even the teenagers could do it! Did contemplate that……only for a minute……..but it was cleaning day today & the kitchen is sparkling so I didn’t want mess every where (party on weekend so wanted to try & keep things in order). To spice things up a little I added a few chilli flakes – just enough to give it a little kick. Tasted delicious with the mash – did make it a little chunky & drier than normal so the sauce could be mixed in! All that I can say is YUM YUM YUM! Now while teenagers slave @ part time job, I’m sitting back with a cider waiting for my creamy rice to cook.

    Would you recommend to other mums?
    Versatile & suitable for lots of recipes
    Saves time & makes my life easier
    Simple to understand & easy to use


  • Beef Goulash oooh la la!!!!

    I knew I had a busy day today with teenager no2 so I thought I’d better cook dinner in advance! Tonight was going to be Beef Goulash! Everything seem to flow like clockwork. I think I might be getting the hang of the Home Cooker & what it can do! The chopping tower sliced the onions in seconds, I added the spices & oil & I was off with 20mins to prepare the meat & other ingredients. After adding the final ingredients I had plenty of time for something else before I had to reset the timer for the next stage. Arghhh- I had left 5 loads of washing to do. The Home Cooker gave me some time to hang, reload & hang again (hmmm is that what my “another set of hands” has done – more time for housework).
    Recipe was very easy to follow. The best thing was coming home knowing dinner was done. The vote from the contented family was 5 stars for the recipe (no leftovers). The process of cooking was very simple! Its time to clean the pan & cook the beetroots for salads this week 🙂

    Would you recommend to other mums?
    Versatile & suitable for lots of recipes
    Saves time & makes my life easier
    Simple to understand & easy to use


  • No more creamed rice in a can

    Creamed rice is one of my favourite childhood memories. My Mum made it as it was a relatively easy desert to make but required one of the 6 kids to stand and stir so the milk /rice didn’t stick or burn on the base. It was a job that I quite often got lumped with being the youngest. The older siblings just made it sound so exciting. We always had stewed rhubarb & apple with our rice.
    Jamie’s recipe is delicious! Very creamy & full of flavour! I did add a little extra sugar as I wanted sweet rice. Topped it with a little drizzle of maple syrup. I had never used vanilla beans so was excited to taste & see how much they flavoured the rice. Never will I buy creamed rice again. I will be using the HC for this.

    Would you recommend to other mums?
    Versatile & suitable for lots of recipes
    Saves time & makes my life easier
    Simple to understand & easy to use


  • Mastered!

    Well we have mastered the rosemary potatoes! they are so easy & delicious to make that the boys have suggested we make them every night! LOL……have to say that a good hard waxy potato is the best to use to hold its shape & doesn’t get shaved by the stirring arm. Just love to add the ingredients & walk away, come back later to delicious crunchy roasted potatoes. All smiles in this household.

    Have been using the HC to make our Japanese curry. Its so easy now as I’m not constantly running back to stir the sauce & ingredients. No more sticking to the base of the saucepan because I’ve forgotten to stir. Love that I have a “little helper”.

    Would you recommend to other mums?
    Versatile & suitable for lots of recipes
    Saves time & makes my life easier
    Simple to understand & easy to use


  • Spaghetti

    The process was very easy to make this sauce. In the past, I would normally be watching & stirring every now & again just so my sauce wouldn’t stick to the bottom of the saucepan. Not today – just walked away & let the Home Cooker do its thing.
    Our sauce just didn’t turn out as rich & full of flavour as I would’ve liked. Not sure why – I did however use Pork mince for the first time ever. Normally only ever use beef mince but someone told me to try the pork. Thats OK – I’ll just use my favourite recipe in future. Teenager 1 has enough sauce for Wednesday school lunch!

    Would you recommend to other mums?
    Versatile & suitable for lots of recipes
    Saves time & makes my life easier
    Simple to understand & easy to use


  • Is it dinner time yet???

    I have just put my crispy potatoes on and the house is smelling so amazing that I am salivating. I am planning on adding in some carrots, sweet potato & parsnip with 30 mins to go so hopefully they turn out ok! I love the fact that having the vegies in the home cooker has freed up the space in the oven for my chicken and fish and I don’t have to worry about having different temperatures. Can’t wait for dinner, will fill you in on how it goes 🙂

    Would you recommend to other mums?
    Versatile & suitable for lots of recipes
    Saves time & makes my life easier
    Simple to understand & easy to use


  • Perfect Risotto

    Wow weeee! Have just finished eating the most delicious risotto ever! I was so impressed by the Home Cooker tonight – 5 stars from me. Have never tempted to make a risotto as I thought it was so time consuming standing there stirring the rice. So just thought “Too hard basket”.
    The Home Cooker along with Jamie’s recipe made life so much simpler. The stirring arm of the Home Cooker fascinates my family (&me). Its quite mesmerising watching it.
    Tonight I spent a bit more time, probably because i was quite nervous tackling a risotto. I did use quite a few extra pieces – saucepan, baking dish & fry pan. I didn’t mind as we have a rule in our house – if you cook you don’t clean up! So I just sat back while the family cleaned.
    The thing I love the most is the cutting tower which I used for the onions, celery & cheese. The celery was a little awkward but I quickly worked out the best way to grate it. It makes less mess with no more little pieces flying around the kitchen (this is usually the kids job). Love the design of the cutting tower, fitting nice & snug against the pan.
    Great recipe! Look forward to making this one again.

    Would you recommend to other mums?
    Versatile & suitable for lots of recipes
    Saves time & makes my life easier
    Simple to understand & easy to use


  • Broad Bean & Asparagus Risotto & Chorizo Sausage

    Well I must say I am really loving these 2 appliances. I was going to put them in the cupboard when not in use but I am using them most days especially the chopping tower! I think I have used the chopping tower every night since I received it. Very easy to assemble blades that just click into place & click to remove!
    Tonight was the Broad Bean & Asparagus Risotto (didn’t have the peas so just deleted them). Very simple & easy recipe to follow. I was feeling confident as had used the Home Cooker to create a previous Risotto. Last time I nervously watched & hoped it was going to work. Tonight I just followed the recipe and walked away confidently. The Chorizo Sausage was for teenager No 1 who is not quite sure about the “risotto” meal. I thought if I added the chopped sausage it would appeal to him more. But still had no success in winning him over. Teenager No 2 however enjoyed it thoroughly – which is surprising as he is normally the fussy one. Husband loved the whole minty, zesty lemon flavour.
    Have found the clean up to be easy as have had plenty of “spare” time during the cooking phase to clean up before dinner, just leaving the pan to clean.
    Have found a recipe for some steamed ginger cakes so am thinking I might try that tomorrow night when teenagers are at work :).

    Would you recommend to other mums?
    Versatile & suitable for lots of recipes
    Saves time & makes my life easier
    Simple to understand & easy to use


  • Being brave - Chilli Garlic Chicken & Chorizo Sausage

    Teenager no 1 has always been a big eater! To combat the lunch time appetite has been making a large salad with chicken strips. I thought I might try & cook the strips in the Home Cooker. After infusing the oil with chilli, garlic, thyme & rosemary for about 15mins, I added a chopped chorizo sausage (I didn’t realise how much oil these would release) & fried them for about 10mins, turned the heat down & added the chicken for about 15mins. Probably need to experiment some more but the chicken taste tested by the teenager has got the thumbs up! Teenager cant wait to have his turn on Wednesday for some more experimenting chicken strips. It was much easier than standing by the BBQ and turning the strips. Chicken has remained moist. Lately teenager had been overcooking his chicken. Now with the help of the Home Cooker he will have moist chicken strips with his salad.

    Would you recommend to other mums?
    Versatile & suitable for lots of recipes
    Saves time & makes my life easier
    Simple to understand & easy to use


  • Risotto- take two, my recipe

    So the last risotto was lovely but tonight I decided to make my own recipe in the home cooker= chicken, pumpkin pesto risotto.
    I followed the same home cooker recipe (stock, rice, onion, wine) but fried up some crispy bacon and chicken to add in. Also mixed pumpkin and my home made basil pesto in at the end. Lovely! Nice that I can adapt any of my recipes to cook in the home cooker.

    Would you recommend to other mums?
    Versatile & suitable for lots of recipes
    Saves time & makes my life easier
    Simple to understand & easy to use


  • Homemade Bolognaise in the HomeCooker

    For the first week with the HomeCooker I tried to stick with the Jamie Oliver cookbook recipes while I got used to using the appliance. My family bookmarked several recipes in the cookbook, so wasn’t difficult to limit myself temporarily.

    After a hectic week, I was trying to follow up on some emails that needed my attention last night and I really didn’t have time to follow a new recipe. I almost opted for takeaway, since I really didn’t have time to cook dinner, but then decided to try my own bolognaise recipe with the HomeCooker.

    When I am organised, I usually make my bolognaise sauce in a slow cooker. If I’m not organised, making the pasta sauce usually involves checking the saucepan regularly to make sure that the sauce isn’t catching on the bottom of the pan, not something that I had time or energy for last night.

    Following the temperature guidelines for the Tagliatelle Alla Bolognese recipe in the Jamie Oliver HomeCooker cookbook, I was able to quickly prepare my bolognaise sauce and get back to my work while it cooked. I set the timer to go off 20 minutes before the sauce was ready so that I was prompted to put some pasta on to boil and put some herb bread in the oven. Too easy.

    I’ve included my bolognaise recipe below. I know it isn’t a traditional recipe, but it’s one that my kids love and with the added vegetables, it’s a filling, reasonably healthy meal that I know everyone will be happy with.

    Susan’s Homemade Bolognaise
    2 Tbsp olive oil
    1 medium onion, peeled
    2 tsp crushed garlic (or 2 cloves of garlic, peeled)
    2 large carrots, peeled and ends removed
    2 zucchini, ends removed
    1 small bunch fresh basil, leaves picked and stalks finely chopped***
    500g good quality beef mince
    250mL wine (I used white last night, but would use red if I had it on hand)
    200mL water
    800g tin crushed tomatoes
    500g dried pasta (I used fettuccini)
    Salt and pepper to season
    Shaved Parmesan and garlic bread to serve

    * Make sure stirrer attachment is in place and then set the pan to 175°C. Set up the Cutting Tower with the coarse grater blade next to the HomeCooker
    *Once the pan has heated up, add the olive oil. Use the Cutting Tower to grate the onion, carrot, zucchini and garlic (if using whole cloves) into the HomeCooker. Add basil stalks and garlic (if using crushed garlic) to pan. Set the timer for 15 minutes.
    * Increase temperature to 250°C. Break mince up and add to pan. Set timer for 10 minutes to allow meat to brown.
    * Add tinned tomatoes, wine and water to pan. Season with salt and pepper as desired. Bring to boil, then place lid on pan and reduce temperature to 130°C. Put lid on and set timer for 70 minutes. Check occasionally and use spatula around the edges of the pan.
    * When timer buzzes, remove lid from pan and set timer for a further 20 minutes. Prepare pasta according to packet directions. Prepare garlic bread according to packet directions (or as required).
    * Serve meat sauce over pasta. Top with shaved Parmesan and garnish with fresh basil leaves.

    *** I use Gourmet Garden fresh herb paste tubes if I don’t have fresh herbs available. They last longer if kept in the freezer and are great to have on hand for last minute meals that need finely chopped fresh herbs like coriander, ginger and basil.

    Would you recommend to other mums?
    Versatile & suitable for lots of recipes
    Saves time & makes my life easier
    Simple to understand & easy to use


  • Recipe - Jamie Oliver's Chicken Korma with Coconut Rice

    For my first proper meal prepared with the HomeCooker, I chose the Creamy Chicken Korma with Coconut Rice from the Jamie Oliver HomeCooker cookbook. This recipe is also available on the Philips website.

    The recipe was extremely easy to follow and the curry was delicious. My family were enthusiastic and were keen for me to include this dish in our regular meal plan.

    The stirring arm in the HomeCooker made making this recipe so much less time consuming than preparing it on the stovetop, even though it still took the same time to cook. I was able to wash up, answer some emails and play a board game with my children all without burning the flaked almonds when they were toasting or having the curry catch on the bottom of the pan.

    I did use a spatula to stir around the inside of the pan once or twice while the curry was cooking, but this was easy enough to do when I was taking care of other things in the kitchen. I served the curry with some Mission Indian Naan bread.

    This recipe is definitely a new family favourite.

    Would you recommend to other mums?
    Versatile & suitable for lots of recipes
    Saves time & makes my life easier
    Simple to understand & easy to use


  • The end result - Tagliatelle Alla Bolognese!!

    Well, here it is..the finished result!! This was the most time consumung recipe to make in the Homecooker. It took over 2.5 hours from start to finish, although a lot of that was just cooking time. Considering, I normally whip up a kid friendly spag bol in 30 mins, I had to organise myself to start a lot earlier in the afternoon. The Homecooker still worked its magic though, and the end result was truly delicious and full of natural flavour. I even asked my children which version they preferred and it was a big thumbs up to Jamie!! I was very pleased with my effort, and am pleased that the whole family are trying healthier meals. I even used tagliatelle, torn basil and shaved Parmesan to really make it special. So far, ithe Homecooker has been amazing and I am LOVING testing these delicious meals. My overall verdict on the Tagliatelle Alla Bolgnese is that it is a nutritious and tasty meal but you need to allow the time in the kitchen to get the full benefits.

    Would you recommend to other mums?
    Versatile & suitable for lots of recipes
    Saves time & makes my life easier
    Simple to understand & easy to use


  • stage 1 of Tagliatelle Alla Bolognese

    Yep – my daughter won!! Tagliatelle Alla Bolognnese it is!!
    I thouight I would include this photo as it shows the Homecooker cooking and stirring the first part of the meal – onion, garlic and carrot all chopped using the Cutting Tower and stirring nicely for 15 mins with some olive oil. What I really love about the Homecooker is the fact you can set the timer and leave the ingredients to cook and atir by themselves – a godsend with 4 children to look after! I also really love using all the different fresh herbs and spices, and experimenting with lovely flavours.

    Would you recommend to other mums?
    Versatile & suitable for lots of recipes
    Saves time & makes my life easier
    Simple to understand & easy to use


  • yummy scrummy chocolate pudding!

    After putting the leftover fondue in the fridge overnight, the fondue had become firmer and set to a delicious rich chocolately velvety texture which was delicious to eat on its own instead of as a dip!! Wow – it was so yummy!!

    Would you recommend to other mums?
    Versatile & suitable for lots of recipes
    Saves time & makes my life easier
    Simple to understand & easy to use


  • Jamie's 'My style Ratatouille' done Leisa style!

    I am very pleased with my attempt at Jamie’s Ratatouille, I added some mushrooms in for my own little touch (and because hubby is away, so I can indulge!) and I wish I had of put some more, they really added to the dish. I loved this, it was so easy to make and tasted delicious. I crumbled fetta over the top as per Jamie’s recommendation and it topped it off nicely.
    The only thing I struggled with, was knowing whether or not to have the lid on or off the home cooker. Some of the recipes state what to do, but this one doesn’t so I kept putting it on and taking it off, not quite sure what to do with it, but it all ended up fine. Two of my favourite things about the cooker so far would be 1. not having to continually check and stir things and 2. It is very easy to clean, even the bits that get ‘caramelised’ to the bottom, are very easy to get off. It really does make the washing up process so much easier!
    I would definitely do this dish again, very tasty!

    Would you recommend to other mums?
    Versatile & suitable for lots of recipes
    Saves time & makes my life easier
    Simple to understand & easy to use


  • 1kg of onions sliced in minutes!

    Made Jamie’s French onion soup with gruyere toasts last night. Such a simple recipe but definitely not something I would attempt without the use of the cutting tower! It sliced the kilo of onions needed in a couple of minutes. Would have taken me ages without it! The most time consuming part of the recipe was actually taking the leaves off the fresh thyme. While the fresh herbs did give the soup a lovely flavour, I think next time I would be tempted to use dried thyme! Used the tower to grate the cheese too. Did it easily although made a bit of mess as I didn’t use a big enough bowl. A lot of the cheese landed all over the bench! Much better when whatever you are grating/slicing just needs to go straight into the HomeCooker. Obviously made for this and much more effective.

    Would you recommend to other mums?
    Versatile & suitable for lots of recipes
    Saves time & makes my life easier
    Simple to understand & easy to use


  • Caramelised Lovely Legs & Potatoes

    Have made this recipe many times for the family. Normally do this in a large saucepan on stove top so I thought I’d put the Home Cooker to the test. Experimenting with favourite recipes using the Home Cooker is a bit challenging as the way its done needs to be adjusted. Husband prepared the chicken using the HC – Tbs butter, whole crushed garlic clove (Jamie style crushed) 130 temp & about 10 lovely legs, seasoning for about 10 mins. Husband made sure the chicken was turned initially as we weren’t sure it would work. Then we added a cup of water, potatoes & set the HC on 130 for 30mins. In the future we would not use the stirring arm action during this stage as the constant stirring stripped one of the legs & crushed some of the potatoes. While this is cooking you need to make a caramelised onion sauce – cup of water with 10 small onions peeled, x cut on top, simmer 10 mins covered. Then lid off & simmer till water starts to evaporate. Sprinkle brown sugar 3tbs over & gently mis. Add tbs red wine vinegar. The next stage is to add a caramel & onion sauce to chicken – this is when I would use the stirring arm as it would gently turn the chicken & potatoes. Just needs 2 mins.
    The taste was still delicious with Teenager No 1 consuming 4 legs.
    Overall the HC is wonderful appliance that I am enjoying experimenting with.
    We served our dish with a serve of steamed green beans & carrots. Enjoying how easy it is to clean the pan – quick rinse & straight into the dishwasher!

    Would you recommend to other mums?
    Versatile & suitable for lots of recipes
    Saves time & makes my life easier
    Simple to understand & easy to use


  • DAY 6: OLD-FASHIONED SPICED RICE PUDDING

    We went out last night, so I’m playing catch-up this evening with tonight’s review. I also wanted to keep things easy, so I decided to make Jamie’s Old-Fashioned Spiced Rice Pudding.

    The whole process was really simple: chuck rice, milk, cream, sugar, vanilla and spices into the Home Cooker, turn on the stirring arm and walk away. Come back in half an hour and eat.
    In all honesty, this would have been brilliant if I actually liked the taste of the creamed rice, but unfortunately, I didn’t. This isn’t a reflection on the Home Cooker or Jamie’s recipe, but more to do with the fact that I wasn’t a fan of the heaviness of the dessert. It’s been very hot and humid here in BrisVegas, and maybe if we were in England, listening the the rain pouring outside on a cold night, I would have been more receptive to this kind of dessert. However, I just found the whole dish heavy, fatty (thanks double cream!) and not my idea of a good time.

    On the flip side, the ease in which I made this dish gave a big thumbs up to the Home Cooker. Dishes like rice pudding or risotto (which by the way, I don’t like, either) are perfect for this machine, because they don’t take a lot of time, but they do require a lot of attention. I can only imagine how frustrating it would have been for me if I had spent half and hour constantly stirring the rice, only to taste it and think, Blah.

    So to sum up tonight’s result: if you like creamy rice dishes, then the Home Cooker’s a dream (and definitely give Jamie’s rice pudding recipe a go!). If you don’t, thankfully the Home Cooker can make other kinds of dishes too!

    PS – Sorry, completely forgot to take a photo of tonight’s meal!

    Would you recommend to other mums?
    Versatile & suitable for lots of recipes
    Saves time & makes my life easier
    Simple to understand & easy to use


  • mmm Granola, more Risotto and Mussels!!

    ok so first up i must apologize for not posting any reviews the last few days. what can i say, life just gets in the way sometimes!!
    even though i haven’t posted, i have still been cooking in JOH as i like to call it.

    so since my last review, we have had risotto 2 more times. i am convinced that this is the easiest and best way to cook the perfect risotto, and i think that considering i am a chef, that is a big call!!!!

    so far i have resisted making anything from Jamie’s cookbook, but i couldn’t put it off anymore, as i love granola and thought i would whip up Jamie’s recipe. i doubled the recipe and made a large batch and what can i say. it was so easy to do and tastes absolutely fantastic. this will definetly be a regular on the breakfast menu from now on.

    i have also been thinking of other ways i could utilise the homecooker besides just cooking meals in. so i thought i would test it out by smoking some fish and some duck in it. Perfect!!! this machine really does have a lot of uses besides what you possibly think you can do in it. i have a couple of other things i would like to do in it and will endeavour to try them out this week. so stay tuned!!!

    last night was a slack cooking night, so whilst at the shops still at 5pm i decided to grab a bag of mussels to cook in JOH! quick, easy and effortless! three words that should describe every meal. so, so easy mussels are to do on the stovetop and JOH didn’t disappoint me either. i just opened the bag, threw in the mussels, used the cutting tower and added in some garlic and onion, a red chilli and some coriander leaves and roots, white wine and lid on. set the timer for 6mins on 250 and went and had a chat with hubby. BEEP! dinner is done. God i love cooking this way! just too easy…….

    i am putting together my list of things to cook my friends when they come over for lunch and am saving my favourite all time dish till then PAELLA!! (yep that’s how much confidence i have in JOH that i am not going to even road test it out first).

    I am also going to try out a couple of other cooking methods to, so stay tuned. Until then, i will continue to let JOH make my life easier in the kitchen. xx

    Would you recommend to other mums?
    Versatile & suitable for lots of recipes
    Saves time & makes my life easier
    Simple to understand & easy to use


  • More baby food in the HomeCooker!

    My husband was out tonight so son and I had left over chicken korma from the other night. Decided I couldn’t let the HomeCooker sit idle though so I whipped up some more food for my baby girl. Tonight was mini minestrone (another non-Jamie recipe) and once again, was much simpler than usual to make by using the HomeCooker. Was able to chop up the ingredients as I went, rather than all at the beginning as I normally do, as the stirring arm was doing all the work for me. Saved a lot of time, I think. Here’s my recipe. Baby girl loved it tonight and I now have another 5 meals in the freezer for her for nights when we aren’t having something suitable for her to share as well!

    1 tbsp olive oil
    1 small onion, diced
    1 large clove garlic, peeled and crushed
    1 carrot, diced
    1 stick celery, diced
    Handful of green beans, topped and tailed and cut into short lengths
    2 small potatoes, diced
    2 tomatoes, diced
    1 cup homemade chicken or vegetable stock
    2 tbsp small pasta (I used Risoni, you could also use small pasta stars or macaroni)
    25g frozen peas
    1 tbsp freshly grated Parmesan cheese

    Set the HomeCooker to 130 degrees. Once heated up, add olive oil, onion and garlic. Set the timer for 3 minutes and cook so that onion is softened. Add the carrots and celery and set timer for 5 minutes. Add the beans, potatoes and tomato and set the timer for 3 minutes. Increase the temperature to 175 degrees, add the stock and bring to the boil. Once boiling pop the lid on and set timer for 10 minutes. Add the pasta and set the timer for 5 minutes. Finally, add the peas and set the timer for another 5 minutes. Turn off the HomeCooker and stir in the cheese. Purée for younger babies or serve as is for older babies. You can also roughly mash for older babies.

    Would you recommend to other mums?
    Versatile & suitable for lots of recipes
    Saves time & makes my life easier
    Simple to understand & easy to use


  • Chocolate and Cherry Fondue - delish!!

    Well, after having the delicious smell of French Onion Soup wafting through my kitchen for 2 days – yes, really! it was time to tackle something a little different. What I love about the Homecooker is that it is really building up my cooking confidence and helping me create lovely starters, dinners and desserts that I wouldn”t normally try. The recipes are so easy to follow, and I am having fun following them.
    For a lovely dessert I thought I would try the Chocolate and Cherry Fondue – who could resist that? It really was SO easy to make using the fantastic Homecooker. I simply set the temperature, added the cream and cherries and set the stiirer arm for 10 mins. After the Homecooker had beeped at me after 10 mins I knew it was time to chuck in the chocolate for 2 mins – and that was it – how easy!! I sliced up some banana and found some tinned pears in my pantry which I chopped up too. I gave the children and hubbie a little dipping pot of chocolate each and put the fruit platter in the middle of the table for everyone to help themselves! It was a delicious dessert that everyone loved – so simple yet SO tasty!! The Homecooker is rapidly becoming like my new best friend!! It really is SO easy to use, and I am really enjoying introducing different flavours and textures to the family. I couldn’t find sour cherries at Coles, and so used normal frozen ones instead and I left out the cherry brandy as it was for the kids., but it was still SO delicious!!
    Now, what to cook next? My 8 year old daughter is desperate for me to cook the Tagliatelle Alla Bolognese and hubbie is already drooling over the Creamy Chicken Korma with Cocnut Rice…decisions, decisions….!

    Would you recommend to other mums?
    Versatile & suitable for lots of recipes
    Saves time & makes my life easier
    Simple to understand & easy to use


  • Porridge with "Toasted" Almonds

    I had one of those great intentions last night before bed – be a Mum that would rise before the family to prepare breakfast whilst the family slept. Then my teenagers & husband would then bound out of bed as the smell would be divine hug me dearly & be so grateful that breakfast was ready! But alas I sleep to the alarm, teenagers already awake & half dressed for school, drag myself to the kitchen bench with just enough time to prepare the school lunches. Husband appears 5 mins later & kids are gone! Sigh – it was a nice thought!
    So it was just Husband & I for the porridge this am.
    Toasting the flaked almonds seemed easy enough. My almonds seemed to pile up on the stirring arm & not flip over. I stood there the whole time with the wooden spoon spreading the almonds out. I stopped the process a few times to make sure the arm was in the right place. Some almonds became wedged under the stirring arm as there is a slight gap between the bottom of the arm & the pan base. The almonds didn’t toast so I put them on for another 5 mins – same problems so I just kept spreading them out. The almonds didn’t look like the recipe book so I put them on for another 5mins @ 175. They started to toast finally but still not as golden as the picture. Tasted crunchy so they were put aside.
    I’m a fan of quick oats. We have always argued in our house on how oats should be made. I have only ever used milk but my husband uses water, then cools down with a little extra milk. So I was happy to see it made with milk only. We only used half the ingredients as it was just a romantic breakfast for 2. The porridge was easy to make & cooked well. Have never used maple syrup in porridge & loved that sweet flavour. Old habits are hard to break so I always add extra milk after serving. Bananas don’t last long in our house so didn’t have any to mash & slice. Next time will hide one to make sure it is there for the porridge.

    Would you recommend to other mums?
    Versatile & suitable for lots of recipes
    Saves time & makes my life easier
    Simple to understand & easy to use


  • DAY 5: TAGLIATELLE ALLA BOLOGNESE

    Tonight’s dinner was a traditional spag bol. Jamie Oliver’s Home Cooker recipe book calls for tagliatelle, but on the (very good) chance that my toddler would take one look at tagliatelle and point-blank refuse to even touch his dinner, I thought I’d stick with the tried-and-trusted spaghetti.

    Like most traditional bolognese sauces, the ingredients are simple and the trick is in the slow cooking process. Also, you need to keep the sauce moving – which is where the Home Cooker’s stirring arm, once again, came in very, very handy.

    I started the prepping around 3:30pm and we ate dinner at 6:30pm. Since I’m a stay-at-home mum, this works out fine for me, but if you were going to use the Home Cooker for this particular dish, I would definitely save it for the weekend. Unlike a traditional slow cooker, the Home Cooker isn’t designed to be left cooking for more than a few hours (you would have be at home to keep re-setting the timer, anyway).

    My only (small) gripe was using the chopping tower. For some reason, the last of the carrots, onions and garlic all got caught in the machine, so I had to take them out and chop them by hand. I could have just chucked these last bits of vegetable out, but it seemed like a bit of a waste.

    When I finally served up the finished dish, it really did taste beautiful. I added a little beef stock for some extra richness, and the whole meal tasted warm and comforting. Ironically, my toddler decided that he’d rather eat oranges instead of pasta, so I could have used the tagliatelle after all – but it doesn’t matter now. We have some simply delicious left-overs to look forward to tomorrow, and I’ve had yet another opportunity to make the most of this fabulous Home Cooker.

    Would you recommend to other mums?
    Versatile & suitable for lots of recipes
    Saves time & makes my life easier
    Simple to understand & easy to use


  • 2 meals in 1 afternoon!

    I used my HomeCooker to make two meals this afternoon – a veggie purée for my baby and Jamie’s “Spaghetti Alla Norma” (spaghetti with eggplant, tomatoes, basil and pecorino) for the rest of us. I must say, both recipes were a breeze with the help of the HomeCooker. Have made the veggie purée before in a normal saucepan on the stove top and while it is not hard to make it was made even easier with the HomeCooker to stir for me. It is also one of those recipes that you have to add things at different stages of cooking so this was made super easy with the timer function. Meanwhile, as the stirring arm did its work, I was able to get on with the small amount of preparation needed for the spaghetti dish, and when the purée was finished I was able to quickly wash up the saucepan and start cooking our meal! Then, after some quick instructions to hubby as to what to add when the buzzer went off, I was off to the chiropractor. Was lovely to return to a fed and bathed baby and our dinner almost done. Hubby was made to look like super dad (well he is, but the HomeCooker sure helps!)

    The spaghetti was once again delicious and hubby didn’t even complain about it being vegetarian! 4 year old son said it was “yummy”.

    Now that I am used to it, I am really liking the cutting tower too. Again, sliced my onions for the purée in no time, straight into the pan! Had a slight incident with a sliced finger but that was my own silly fault as I put the blade on the wrong way and cut my finger trying to take it off!

    Here is the recipe for the purée, in case anyone wants to try for their bub (suitable for a 6-9 month old). Mine gobbled it down quickly tonight! A great way to introduce babies to the taste of green veggies as combines nicely with potato.

    1 small onion (or half a larger one)
    15g unsalted butter
    4 small potatoes, peeled and diced
    375ml homemade vegetable stock (or water)
    3 broccoli florets
    50g frozen peas
    50g fresh spinach, washed (tonight I used silverbeet from my mother-in-law’s garden, chopped up a bit)

    Make sure the stirrer attachment is in place in the pan, then set the temperature to 130 degrees. once the pan has heat up, add the butter. Using the cutting tower slice the onions straight into the pan (or chop finely and add to the pan if you don’t have the tower). Set the timer for 5 minutes and sauté the onion (should be softened but not browned).

    Once the buzzer sounds, turn the temperature up to 175 degrees and add the potato and stock. Put the lid on the HomeCooker and once it starts boiling set the timer to 10 minutes. Add the broccoli florets and set the timer for 3 minutes. Add the peas and spinach and set the timer for another 3 minutes.

    Purée to the desired consistency for your baby (smooth for young baby, more textured for older baby).

    Makes about 4-5 serves (depending on how much your baby eats!)

    Would you recommend to other mums?
    Versatile & suitable for lots of recipes
    Saves time & makes my life easier
    Simple to understand & easy to use


  • The Penny Drops…

    So I have spent the better part of this week juggling a crazy work schedule, an absent/travelling husband, three kids (one who was home sick from school for a day), and trying to find time to sort what to cook in the Jamie Oliver Home Cooker. I have not done a supermarket shop for nearly two weeks and am starting to ferret around sections of the pantry I haven’t ventured for quite a while.
    Tonight I figured spaghetti bolognaise was the perfect, easy, quick dinner to feed my constantly ‘staaarving’ boys and decided to cook it in Jamie’s home cooker. That was one very smart decision indeed. I didn’t cook Jamie’s recipe, I cooked my ‘stock standard’ that I know the boys will devour, and the cooker was awesome. Instead of standing over a saucepan frying, stirring, fiddling with the heat, lid on, lid off, stirring more – I simply put in the mince, onion, bacon, carrot and a little oil, let the stirrer brown that up on 175 degrees, then added tomato paste for a few minutes of heat before tipping in passata, tinned tomatoes, beef stock, few dried herbs and seasoning. Then I reduced the heat to 130, set the timer for 30 mins and walked away to spend some quality time hanging out with the kids. This is something I NEVER do in the middle of dinner prep. Was a like a gift of time. And the cleaning up was minimal as well. Not sure why, same ingredients, same number of pans but it all seemed very easy and fast.
    So my moment of clarity: use the cooker for all the stuff you already cook for midweek dinners. And then you can also use it for when you have the headspace, conditions and reason to cook something new, imaginative or more complex.
    Worth noting am yet to venture back to the chopping tower. Am thinking that device is more for when you are doing a lot of chopping or feeding a lot of people (which I often do with entertaining family and friends), however less for every night dinners. Am going to give the French Onion soup a crack as I think that will be my bonding moment with the chopper. Plan is to cook that tasty treat this weekend.
    Till then. Enjoy your plucka tucker.

    Would you recommend to other mums?
    Versatile & suitable for lots of recipes
    Saves time & makes my life easier
    Simple to understand & easy to use


  • Not so crispy potatoes!

    Well my attempt at the crispy potatoes unfortunately was not a great one I think the main problem was that the potatoes I used were not waxy enough, they seemed to disintegrate while they were cooking and all stuck to the bottom of the cooker, along with the garlic and rosemary. Part of the problem, I think, is that the stirring arm doesn’t touch the bottom of the cooker very well, so it doesn’t seem to scrape up all the little bits that are sticking. I had to stop half way through and empty the vegies out so I could clean it and then keep going to stop the burnt flavour going through. Even the rest of the vegies didn’t crisp up, (I think mainly due to the think layer of potato on the bottom) Fortunately though, the vegies seemed to taste ok. I will definitely try this dish again, with a different kind of potato and without the extra veg as I can see the potential in the dish. I am interested to read the other Mums reviews on crispy potatoes now and find out the trick to getting it right!
    My husband (who strangely enough) doesn’t eat mushrooms, is away this weekend so I am on the lookout for a mushroom dish to try next!

    Would you recommend to other mums?
    Versatile & suitable for lots of recipes
    Saves time & makes my life easier
    Simple to understand & easy to use


  • Potatoes again - so easy and yummy!!

    On the way home from school today my 11 year old asked me “Are we having Jamie tonight?” Yes, we had Jamie, the potatoes were a hit once again and cooked to perfection by my Homecooker but I am happy to take the credit!
    Over the weekend we are planning to impress a school friend with some yummy deserts and may even have a go at the brekkie recipies.

    Would you recommend to other mums?
    Versatile & suitable for lots of recipes
    Saves time & makes my life easier
    Simple to understand & easy to use


  • Broad Bean & Asparagus Risotto & Chorizo Sausage

    Well I must say I am really loving these 2 appliances. I was going to put them in the cupboard when not in use but I am using them most days especially the chopping tower! I think I have used the chopping tower every night since I received it. Very easy to assemble blades that just click into place & click to remove!
    Tonight was the Broad Bean & Asparagus Risotto (didn’t have the peas so just deleted them). Very simple & easy recipe to follow. I was feeling confident as had used the Home Cooker to create a previous Risotto. Last time I nervously watched & hoped it was going to work. Tonight I just followed the recipe and walked away confidently. The Chorizo Sausage was for teenager No 1 who is not quite sure about the “risotto” meal. I thought if I added the chopped sausage it would appeal to him more. But still had no success in winning him over. Teenager No 2 however enjoyed it thoroughly – which is surprising as he is normally the fussy one. Husband loved the whole minty, zesty lemon flavour.
    Have found the clean up to be easy as have had plenty of “spare” time during the cooking phase to clean up before dinner, just leaving the pan to clean.
    Have found a recipe for some steamed ginger cakes so am thinking I might try that tomorrow night when teenagers are at work :).

    Would you recommend to other mums?
    Versatile & suitable for lots of recipes
    Saves time & makes my life easier
    Simple to understand & easy to use

Click here to post a review

Reviews on this page have now been disabled.

To register for reviews that are not open yet and for future reviews, enter your email below and we'll send you an email as soon as a review is open for application.

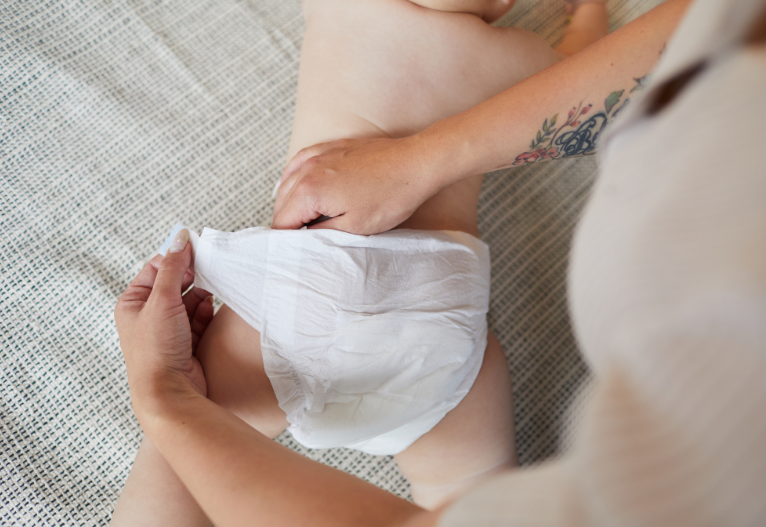
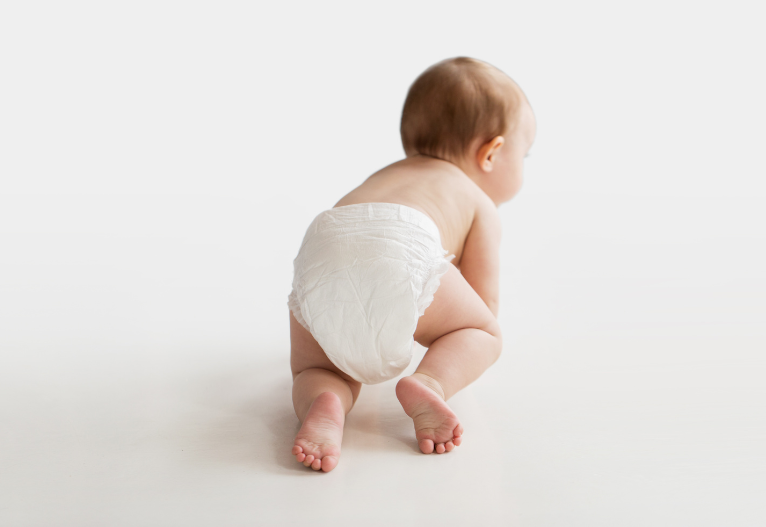
Whether you’re a seasoned or first-time mum, protecting your baby’s delicate skin is right up there on the priorities list. Because when their skin is irritation-free, it really does make for a happier bub! Anyone who’s had to deal with nappy rash (me included!) knows it’s an inescapable mum truth.

Having skin irritation as an adult is super distracting and annoying. So just imagine what that’s like for our teeny babies and toddlers, who need to focus on sleep, eat and play. No wonder they can be so upset when they have nappy rash.

One thing you do need to ditch when it comes to nappy rash is mum guilt. It happens despite our best efforts. But it is helpful if you can get ahead of the game by doing as much as you can to try and prevent nappy rash in the first place.

We asked our hundreds of thousands of Mouths of Mums members for their tried-and-true, trusted nappy rash tips, and their responses came down to four key tips. So if you’re about to have your first baby, or your fifth, it’s worth popping on the kettle and reading through what’s helped other mums.

Fail-Safe Nappy Rash Tips From Mums

What we love about these tips is they’re perfect for mums and expecting mums, and they’re really simple to do. Everything from what to use and what to steer clear of, to helpful hints on caring for delicate baby skin.

1. Nappy Free Time

“As much free nappy time as possible. Lay baby on a blanket covered with a towel on the floor, without a nappy on, if possible in front of a warm sunny window.” – Joanne W.

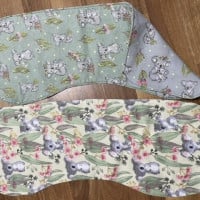
We love nappy free time for newborn and toddlers (although it’s a lot harder to get them to stay in one place!). And while nappy free time is one of the most popular nappy rash tips among our mums, using the right nappy also plays a huge part in protecting against irritation on your baby’s skin. For example, Huggies Ultra Dry Nappy Pants have clever Rapid-Dry™ Technology, which instantly absorbs for drier skin. And they’re perfect for day and night, with up to 12 hours of leakage protection.

2. Change Nappies Frequently

“For me, what worked on my two kids is not leaving them in soiled nappies too long. I definitely changed as soon as they were wet and let their skin air dry before placing a new nappy on. I would rather go through more nappies than have to deal with the uncomfortable rash they would feel.” – MoM Member

Frequent nappy changes are a fail-safe way to keep moisture, but it’s not always practical (babies just love to fill their nappies while you’re out and about!) Huggies Newborn Nappies are designed to help protect a baby’s delicate skin with a zinc-enriched layer*, clinically proven to help protect against skin irritation.

3. Use A Barrier Cream

“My mum put me onto Zinc and Caster Oil cream. It is FABULOUS stuff! It’s very thick and sticks like you know what to a blanket hehe I tried literally everything and this was the only stuff that helped.” – Trudes

Using a barrier cream was another really popular tip from our mums. But did you know that Huggies Newborn Nappies are the only nappy with a zinc enriched layer. The zinc oxide in Huggies Newborn Nappies is the same ingredient found in many nappy rash creams, which helps to protect against irritation with visibly less redness on skin. They’re also endorsed by the Australian College of Midwives and the number one choice in Australian hospitals.

4. Choose Gentle

“Don’t use scented wipes. Flannel and warm water is the best.” – Justine F

Using the most natural product possible for wiping a baby’s delicate skin to prevent irritation is a tip that’s been passed down from generation to generation – and it’s still a great one. But something lots of mums don’t consider that a nappy itself can help protect against skin irritation. Huggies Newborn Nappies are clinically proven* to help protect against skin irritation while Huggies Ultra Dry Nappy Pants keep up with wriggly little ones while providing superior dryness, making them perfect for active toddlers.


Nappy Rash Myths & Facts

🚫 Myth: Nappy rash is only caused by wet nappies.
✅ Fact: It’s true that moisture does play a role in nappy rash, it can also be caused by moisture friction, bacteria, and even what the nappy is made from.

It’s why choosing a nappy that’s specifically designed for skin protection is really important.

🚫 Myth: Cloth nappies are better at preventing nappy rash than disposable nappies.
✅ Fact: When it comes to nappy rash, there’s not really any need to compare cloth and disposable nappies, because it’s all about keeping baby dry. The longer baby can stay dry, the better.

Huggies’ Rapid-Dry™ Technology absorbs wetness instantly, reducing irritation risk.

🚫 Myth: Nappy rash creams are the only way to protect against irritation.
✅ Fact: A good nappy with a zinc enriched layer can also help to protect against irritation.


Find Huggies Newborn Nappies and Ultra Dry Nappy Pants in your supermarket nappy aisle today.

Mouths of Mums is working with Huggies to bring you this handy information.

*Zinc as Zinc Oxide. Tested on adult skin as a suitable substitute for baby skin.
*#1 choice in Australian hospitals based on sales data.

    Post a comment

    To post a review/comment please join us or login so we can allocate your points.

    ↥ Back to top

    Thanks For Your Star Rating!

    Would you like to add a written rating or just a star rating?

    Write A Rating Just A Star Rating
    Join