
Now it might not sound like your cup of tea, I can certainly tell you I was apprehensive the first few times, but getting kids into the kitchen is giving them a gift that keeps on giving – it’s good for them, and it’s good for you believe it or not.
I have a love affair with food. It used to be specific to food that someone made for me, but in recent years I have reignited my love for cooking and getting creative in the kitchen – the same love I had when I was little. I’ve even become a little more adventurous with my meals and the results speak for themselves, kids with clean plates (sometimes) is the BEST form of flattery, isn’t it!
This all stems from being a bright eyed, excitable kid and having the most beautiful great grandma a girl could ask for, one that loved me unconditionally. The bonus was she made lots of cakes and sweets AND I was allowed to lick the bowl. EVERY. SINGLE. TIME.
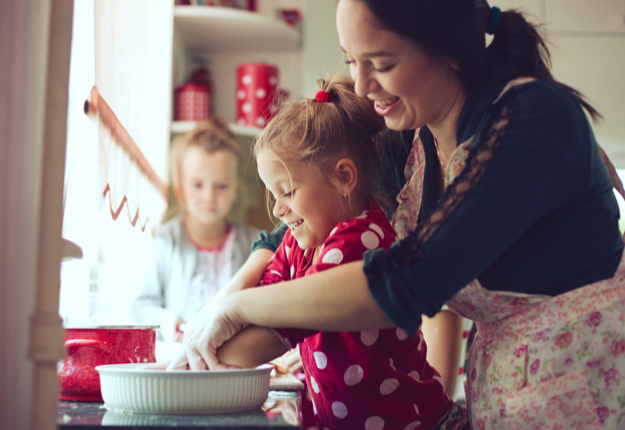
Some of my favourite memories are of Grammy and I in the kitchen and it’s certainly helped shape my love of food, it’s something I want to share with my kids and whilst there have been a few, lets call them episodes, in the kitchen with my kids along the way, I can tell you that the good outweigh the bad, tenfold.
Here are the top 5 benefits I’ve experienced by getting my kids into the kitchen:
- They’re busy – Do you ever need to fill an hour or so? Getting creative with the kids in the kitchen is WONDERFUL to fill in some time- you also have the extra benefit of not having to worry about what to feed them (or yourself) for afternoon tea. It’s the perfect solution for a rainy day boredom buster.
- They feel as though they’re being helpful – I don’t know any little people who don’t like being helpful. The look of pride on my little girl’s face when I thank her for making dinner is absolutely priceless. She also beams with pride when I tell her Dad what we made that day. They just love to be helpful don’t they?!
- Encourage a love of healthy food – How many times have you made a yummy healthy dinner for the kids and they just refuse to eat it? Whilst my 2 year old is still in the fussy ‘I don’t want to eat it’ phase, my 4 year old LOVES to help (see point number 2), and when she helps we talk about how big and strong certain foods make her, she helps to put the meals together and then of course wants to try them as she has made it. Win/win!
- Quality time together – Cooking is something that everyone has to do at some point, so why not make it quality time? It’s a place for no screens (unless you’re reading a recipe from your iPad) and the perfect opportunity to talk about anything and everything. They tell you all sorts of fun things and I am hoping this will be something that continues for a very long time with my children.
- You can relax and laugh – now stay with me on this one. I know that getting the kids into the kitchen can be the stuff of nightmares … Believe me, I’ve been there. But the surprising thing about having a 2 year old pouring flour, milk and butter onto the floor is that you might think you’re going to lose it, but you can get through it. You can take a deep breath and realise that there really is no use crying over spilt milk and then you can pat yourself on the back and LAUGH about it. Because life is no fun unless things are messy!
To help inspire you to get kids cooking our friends at BEGA have set up an AMAZING competition that you don’t want to miss! 3 incredibly lucky winners will receive the ULTIMATE KitchenAid pack worth over $5,000 each. There are also 1000 Head Chef kids utensil packs to be won. For your chance to WIN head over to the competition page now to find out more.
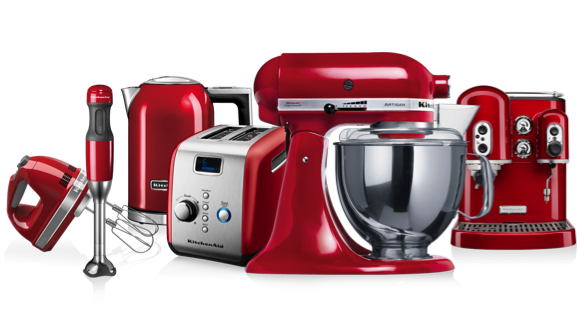

It’s always best to start with some tried and tested recipes that you just KNOW your kids are going to love, so here are a few recipes that are sure to bring out that little MasterChef of yours!
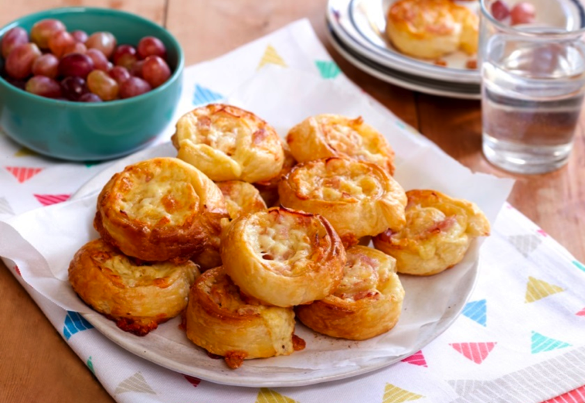
Cheese & Ham Scrolls
Using Bega Country Light Grated Cheese
Makes: 20 | Preparation Time: 5 minutes | Cooking Time: 20 minutes
- 2 sheets frozen puff pastry, defrosted
- 1 egg, lightly beaten
- 2 cups Bega Country Light 50% Less Fat* Grated Cheese
- 100g ham, coarsely chopped
- Preheat the oven to 200 and line two large baking trays with baking paper.
- Lay a sheet of thawed pastry onto a surface or chopping board. With help from the kids, brush a small amount of beaten egg over the pastry. Evenly sprinkle half the Bega Country Light Cheese and half the ham over the pastry, leaving 1cm of clear pastry on the edge.
- From the opposite edge, tightly roll the pastry like a jam roll, pressing the clean edge onto the pastry to seal. Cut the roll into 2cm thick slices and place on the trays, cut-face up.
- Repeat with the remaining pastry.
- Brush the tops lightly with the remaining egg, then transfer the trays into the oven to bake for 15 – 20 minutes or until the pastry turns golden.
- Serve warm or at room temperature for a delicious treat.
Tip: Try using other fillings like tomato, salami or your other favourite pizza toppings to make a pizza scroll.
* Contains 50% less fat than Bega Tasty Cheddar Cheese which contains 34.7g fat per 100g.
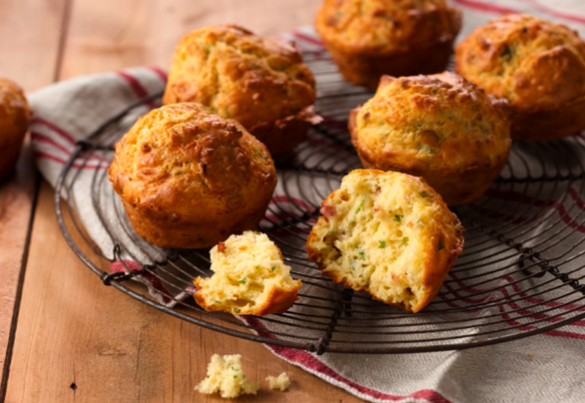
Cheese & Bacon Muffins
Using Bega Farmers’ Tasty Grated Cheese
Makes: 12 muffins | Preparation Time: 20 minutes | Cooking Time: 25 minutes
- 2 rashers rindless bacon, diced
- 1 tbsp olive oil
- 3 eggs
- ¾ cup milk
- 50g Western Star Original Butter, melted
- Pinch cayenne pepper
- ½ tsp salt
- 2 tbsp parsley, chopped
- 2 cups self-raising flour
- 1 cup Bega Farmers’ Tasty Grated Cheese
- Preheat the oven to 190
- Place a frying pan over medium to high heat. Add the olive oil, then fry the bacon for 1 – 2 minutes or until crispy.
- In a bowl, whisk together the eggs, milk, butter, cayenne pepper, salt and parsley.
- In a separate bowl, mix the flour, bacon and Bega Farmers’ Tasty Cheese. Then stir through the egg mixture until all combined. Spoon the mixture evenly across the 12 hole non-stick muffin pan.
- Bake the muffins in the preheated oven for 25 minutes or until well-risen and golden brown.
- Cool for 5 minutes before serving either warm or at room temperature.
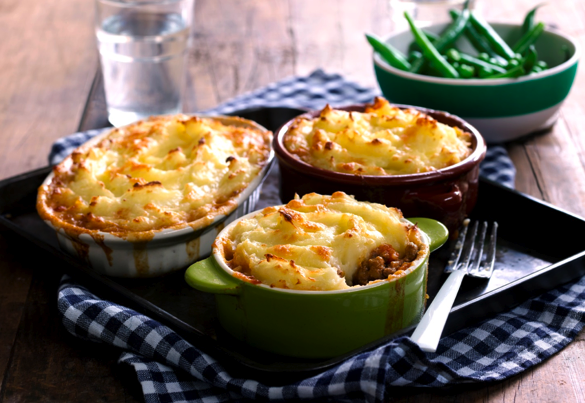
Mini Cheesy Shepherd’s Pies
Using Bega Farmer’s Tasty Grated Cheese
Makes: 4 | Preparation Time: 15 minutes | Cooking Time: 1 hour and 10 minutes
- 1 tbsp olive oil
- 1 onion, chopped
- 2 carrots, chopped
- 500g lean lamb mince
- 2 tbsp salt reduced tomato paste
- 1 tbsp Worcestershire sauce
- 500ml beef stock
- 700g potatoes, peeled and cut into large chunks
- 65g Western Star Original Butter, chopped
- 100g Bega Farmers’ Tasty Grated Cheese
- 2 tbsp milk
- Salt and pepper (to taste)
- Preheat the oven to 180. Grease 4 small ovenproof pie dishes.
- Heat the oil in a medium saucepan over medium heat. Add the chopped onion and carrots, then cook for 4 – 5 minutes until softened. Add the lamb, cook for a further 8 – 10 minutes stirring regularly, or until browned. Now add the tomato paste, Worcestershire sauce and stir to combine. Pour in the stock and bring to a simmer. Reduce the heat to low and cover with a lid. Simmer for 35 minutes.
- While the lamb is cooking, bring the potatoes to a boil in a large saucepan over a medium heat. Boil for 10 minutes or until the potatoes are tender. Drain into a colander, then return the potatoes to the pot. Add the butter, milk and half of the Bega Farmers’ Tasty Cheese, and season with salt and pepper to taste. Get the kids to mash it all together until you have a smooth mash.
- Divide the mince between 4 pie dishes, top with the mash and sprinkle over the remaining cheese. Transfer the pies into the oven to bake for 20 -25 minutes or until the cheese has meted and starts to turn golden brown.
- Remove the pies from the oven and allow them to cool for 5 minutes before serving. Steamed peas and greens make great accompaniments for a delicious dinner.
Tip: Try using beef mince instead of lamb to make these mini cottage pies. Or you can add other vegetables like mushrooms and corn to suit your taste.
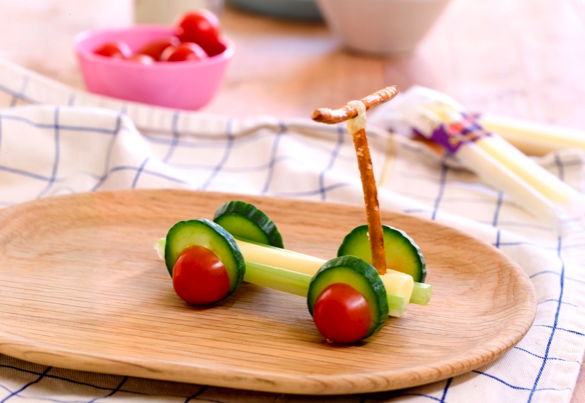
Stringer® Scooters
Using Bega Stringers®
Makes: 4 scooters | Preparation Time: 5 – 10 minutes
- 2 sticks celery, halved and sliced into 8 long thin slices
- 4 Bega Original Stringers®
- 1 cucumber, sliced thinly
- 8 cherry tomatoes, halved
- 8 pretzel sticks
- 8 toothpicks
- Build the base. Lay two thin slices of celery next to one Bega Stringer. Place a small toothpick through each end, securing the celery and Stringer together.
- For the wheels, place a slice of cucumber and a cherry tomato half on both ends of the toothpicks.
- Make a T-shape with two pretzels for the handlebars and secure with some extra cheese. Bega Bar-B-Cubes are great for this or try melting a small piece of Stringer in the microwave to make it pliable. Place the T-shape into one end of the Stringer, pressing carefully but firmly through the cheese.
- Repeat with remaining ingredients to create three more scooters as part of a fun healthy snack.
I hope that by instilling the above my kids will have a love for food just like I do, then cooking won’t be such a chore (or a bore!). For more recipe ideas, head to the Bega website.










11:59 am
2:37 pm
11:36 pm
5:19 pm
9:41 am
12:11 am
-

-
-
mom94125 replied
- 17 Oct 2015 , 3:53 pm
Reply4:01 pm
8:13 pm
11:24 am
12:36 pm
-

-
-
mom94125 replied
- 17 Oct 2015 , 3:52 pm
Reply8:36 pm
10:40 pm
1:44 pm
9:19 am
11:56 am
10:30 pm
7:27 pm
2:10 pm
12:06 am
9:08 am
- 1
- 2
- »
Post a commentTo post a review/comment please join us or login so we can allocate your points.