

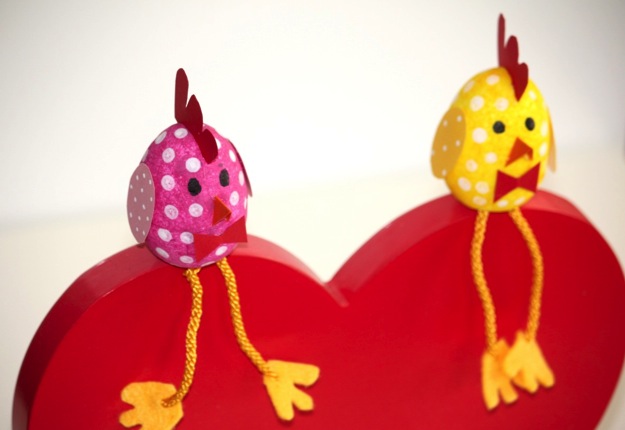
There’s so many cute Easter crafts out there and these little polka dot Chirpy Easter Chickens were just too adorable to ignore and so we had a fun time creating them and they’ve found a perfect place to perch themselves on the windowsill!
Materials
- Styrofoam egg
- Cardboard – red and orange
- Paint (whichever colour you would like your little chicks to be)
- Paintbrush or a small piece of sponge
- Patterned paper for the wings (if you don’t have any then just colour your own and add some polka dots)
- Craft glue
- Yellow rope (wool or string would work just fine)
- Yellow felt
- Black marker
- Scissors
- Toothpick
- Cotton bud
- Sharp knife (only to be used by an adult)
- Sticky tape
Method
1. Using a sharp knife, slice a small piece off the bottom of the egg so that it can sit without rolling over.
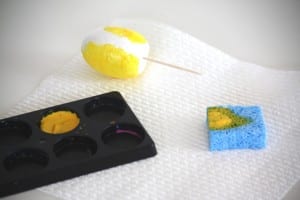
2. Push a toothpick into the base to make it easier to hold and paint.
3. We found the sponge was a very easy way to paint the egg without getting streaky lines. Dip the sponge into the paint and cover the egg, you may decide to do 2 coats. Allow the paint to dry completely.
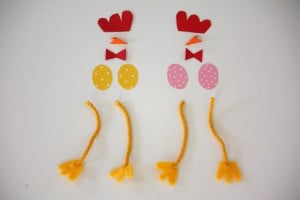
4. Whilst the paint is drying, cut out all the cardboard, felt and paper shapes you need.
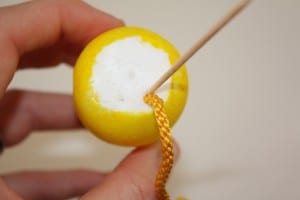
5. Use the toothpick to make 2 small holes in the base of the egg, squeeze some glue into the holes and then push the rope into the holes using the tootpick to help.
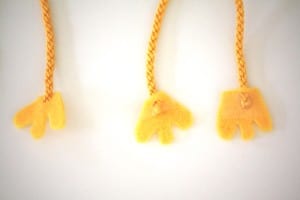
6. Use a punch or scissors to make a small hole in both of the felt feet. Thread the rope through each hole and secure on the back with some tape.
7. Using glue, attach the wings, beak, bow tie and comb (the red part on top of the head….I had to google the actual name, you learn something new every day!) For the comb, make a small slice in the egg and insert the base of the comb with some glue so that it stays in place.

8. Use a black marker to draw on the eyes.
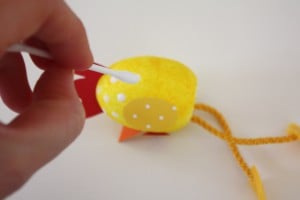
9. If you want to add some polkadots it’s easiest to apply them with a cotton bud to get even spots.
Your cute little chick is now complete and all you need to do now is work out where to perch it!


11:40 pm
12:21 pm
2:58 pm
6:08 pm
2:07 pm
2:21 pm
11:07 am
8:34 am
12:07 am
4:57 pm
11:12 pm
9:04 pm
8:47 pm
4:24 pm
9:44 am
8:29 am
10:13 pm
9:14 pm
6:55 pm
8:45 am
- 1
- 2
- …
- 5
- »
Post a commentTo post a review/comment please join us or login so we can allocate your points.