

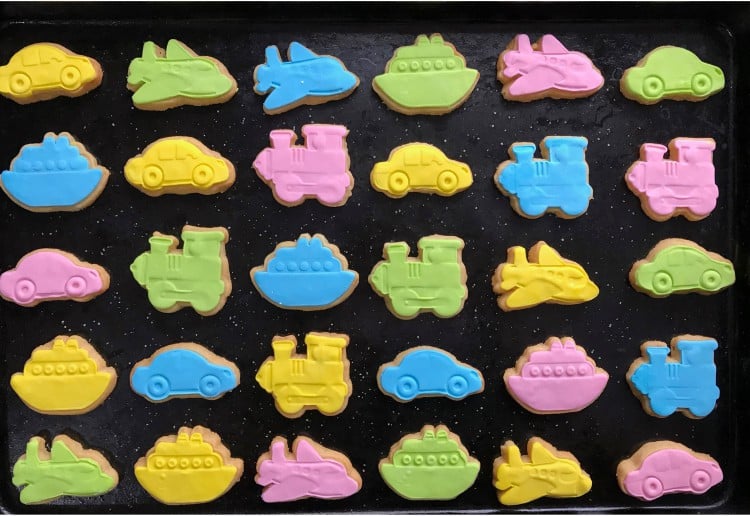
While these Fondant Malt Cookies for Kids take a bit longer to decorate than other cookies, they are definitely worth it and will be sure to wow the kids!
Ingredients (makes 40 large biscuits)
- 1 Box White fondant
- 200g Unsalted butter, softened
- 3/4 cup Caster sugar
- 1 Egg yolk
- 2 1/4 cups Plain flour
- 1/2 cup Malt powder, sifted
- 1 TBS Milk
- Assorted food colouring gels
Method
- Pre heat the oven to 180 degrees, and line a couple of baking trays
- In a large bowl, beat the sugar and butter together until light and creamy. Add in the egg yolk and beat to combine
- Stir through the malt powder, flour and milk to form a dough. Wrap in plastic wrap and place into the fridge for at least ½ an hour or until firm
- Roll the dough out on a lightly floured board (also flour your rolling pin) until about a ¼ inch thick and using your choice of cutters, cut out shapes
- Carefully place on the baking trays, and place into the oven for around 8 minutes or until just golden brown. If you want a chewier biscuit remove before they go too brown or if you like crunchy, leave in to brown up a bit more. Cool on the trays
- While the cookies are cooling, divide a box of fondant into 4. Place into separate bowls and add a couple of drops of different food colouring gel to each one.
- Put one ball of fondant into a zip lock bag, shut and massage from the outside of the bag until fondant and gel is pretty well combined.
- Remove the fondant from the bag, place onto a board and with gloves on, knead to fully incorporate the coloring gel into the fondant. Repeat with all colours – making sure to thoroughly clean the board in between colours and also use different bags and gloves as to not mix the colours
- Lightly dust the board and rolling pin with icing sugar and roll out each colour separately until they are quite thin. Using the same cutters you used for the cookies, cut out different colour fondant shapes to correspond with the different cookies you have cooked
- Match up your cookie shapes (once cooled completely) with the fondant shapes that match. Lightly brush a cookie with a bit of water (I use a clean small paintbrush) and place the fondant on top. Smooth fondant on gently to the cookie and set aside. Repeat with all cookies until finished.
- Let cookies set for about an hour before serving so the fondant adheres to the cookie
Notes
Store in an airtight container for a week. Depending on the type and size of the cutters you use, you may get more cookies from the dough. I use quite small cutters and get around 60 small cookies from it. This dough freezes really well too, so if you wanted to make a batch and then halve it, you will have enough for around 20 large and 30 small per half. Just make sure to wrap dough tightly in cling wrap and place into a zip lock bag before freezing. When you're ready to use it, just remove from the freezer 3 hours before you need it to allow it to thaw


9:04 pm
5:44 pm
10:39 pm
10:52 am
10:14 pm
10:17 am
7:48 pm
2:18 pm
10:54 pm
9:19 am
8:56 pm
1:42 pm
8:01 am
12:32 pm
10:51 am
12:01 pm
8:46 am
12:28 am
8:49 pm
8:06 pm
- 1
- 2
- »
Post a commentTo post a review/comment please join us or login so we can allocate your points.