
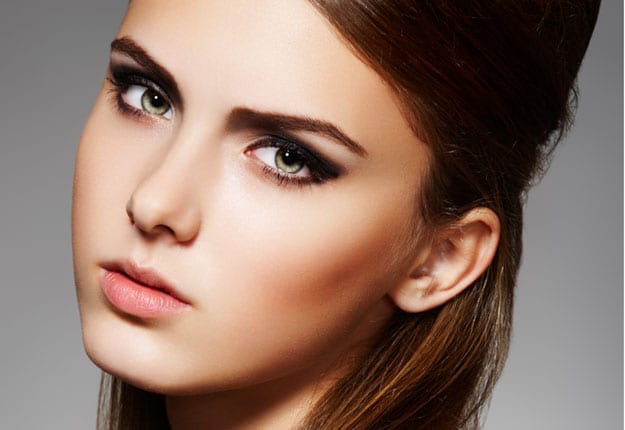
The Smokey Eye… As daunting as a Smokey Eye may sound to most of us, it is the perfect look for any of your 2013 events and festivities. The best part about the following look is that you will only need to set aside roughly 20 minutes to create your whole look.
While working through the following steps it is important to remember to apply a little bit of colour at a time building more colour as you go if you want to achieve a more dramatic look. It is always easier to add more colour than to remove too much.
Step 1 – Apply Eyeliner to your upper lash line
Following the steps in ’10 Minute Makeover for Busy Mums’ or by following your own personal routine, create your perfect base.
Using an eyeliner pencil run a line, using short strokes along your upper lash line. Start as close to your lash line as possible working up across your mobile lid as demonstrated. These lines do not need to be neat or straight as we will be blending the liner to create a softer look in the following steps.

* Tip – you can create any colour smokey eye using various shades of browns, blacks, grey, purples, blues, greens… be as creative as you like
Step 2 – Smudge and set your eyeliner
Press your eyeshadow brush/sponge tip into your preferred eyeshadow colour, tap brush/sponge to remove any excess eyeshadow before you apply.
Using a pressing motion dab the eyeshadow all over the area you have applied your eyeliner pencil. Pat then stroke the shadow from the outer to the inner corner of your eye ensuring you apply the eyeshadow all over your mobile lid as demonstrated. Keep blending until the eyeliner is smudged and softened.

* Tip – Creating a smokey eye with dark colours can be messy. If eyeshadow falls onto your cheekbones leave this until you have completed your look then simply wipe off and re-apply your base if required.
Step 3 – Smooth and soften your socket line
Once you have reached your desired depth of colour dab a clean eyeshadow brush/sponge tip into a softer more neutral eyeshadow. Using a dabbing motion, sweep this colour along your socket line as demonstrated here.
Apply this colour from your socket line and slightly above toward your brow bone to soften and blend the edge of your dark eyeshadow.

Step 4 – Highlight your brow bone
Select a soft neutral eyeshadow with a hint of sparkle or shimmer to add highlight and shine to your brow bone. Dab the colour along your brow bone starting from the centre of where your brow naturally arches outwards to the end of your brow.
Ensure that you apply your eyeshadow from where you finished applying your blending shade in step 3; this will create a nice even gradient of colour from your lash line through your socket right up to your brow bone.

Step 5 – Define and shape your eye
You can now use your eyeliner pencil to define and shape your smokey eye.
Run your pencil along the lower lash line (and upper lash line if you want to create more definition) keep you pencil as close as possible to your lash line. Apply your eyeliner from the outer corner to the inner corner as I have done here. Alternatively for a softer look you can apply your eyeliner to only the outer corner.
You can use any eyeliner whether it be pencil, liquid or gel – whichever you feel more comfortable with to create the finishing touches of your smokey eye.

* Tip – You will notice I have applied pencil to my inner rim on my lower lash line. On large eyes this will enhance your smokey eye however, on small eyes applying liner to this area can make your eyes look smaller so go for a white pencil to line the inner rim to create an illusion of larger, brighter eyes.
Step 6 – One final sweep of eyeshadow and apply mascara
To enhance a long lasting smokey eye and create more of a soft, well blended look apply eyeshadow (select a shadow colour similar to the colour of your eyeliner) over your eyeliner along your lower lash line.
Always finish your look with 1-2 coats of mascara to your top and lower lash line.

There you have it – a simple yet glamorous smokey eye.
Add a hint of blush or bronze to your cheeks for a radiant summer flush and your favourite lip colour to finish your look.


10:46 pm
9:35 pm
7:36 am
8:23 pm
3:29 pm
1:38 pm
10:55 pm
7:24 pm
9:29 pm
2:50 pm
9:21 pm
4:36 pm
11:27 pm
1:58 pm
8:28 pm
12:41 am
10:30 pm
5:21 pm
10:06 pm
10:41 pm
- 1
- 2
- …
- 6
- »
Post a commentTo post a review/comment please join us or login so we can allocate your points.